Invite Consignor vs. Add New
Adding Consignors + Export All Consignor Data
To add a consignor, you can invite them to add their own details or add the consignor yourself.
Note: Consignor's must have a unique phone number and email address or their information will be rejected in Shopify.
Consignor is already listed on your "All Users" tab? Review the email to ensure they can login.
First time login into their account? Please click on "forgot password" and follow the steps sent to consignor's email.
--------------------
To add the consignor
a. Click Add New.b. Complete the consignor’s profile information including: First Name, Last Name, Email, Street Address, City, and Zip Code.c. Assign the consignor a username and password.Note: The username will be the same information that was entered into the “Email Address” field.d. Click Submit.
To invite a consignor
e. Click Invite Consignor.f. Enter the consignor’s email address.g. Click Submit.
To export consignor data
h. Click Export All Consignors.
This section of Consignors will explain how to…
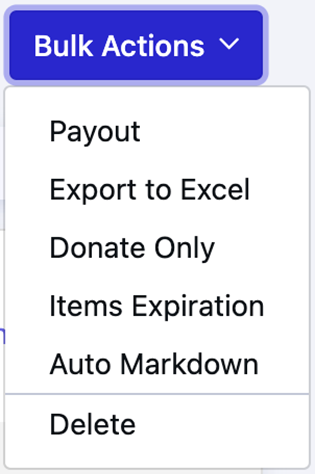
- Payout a consignor- Export consignor data to Excel- Enable or disable Donate Only for a consignor(s)- Allow or disallow Items Expiration- Enable or disable Auto Markdown
To search for a consignor,
a. Enter their name in the textbox below Consignors, or,
Click Filter and sort by Name, Donate only, Account Balance, Assigned Payment Method, Store Credit, Unpaid Disbursement, or No. of Items min/max
Click Filter and sort by Name, Donate only, Account Balance, Assigned Payment Method, Store Credit, Unpaid Disbursement, or No. of Items min/max
c. Click Apply Filter.