Setting up DYMO LabelWriter - Mac OS
To connect your DYMO thermal printer to your Mac computer follow the steps below:
1. Go to "System Preferences" and hit "Printers & Scanners app
" icon:
2. Click on the "+" sign to add a new printer:
3. Choose the DYMO from the list and click "Add":
4. You should now see your DYMO installed on your computer:
5. Open your browser (Google Chrome or any browser) and type the following: http://localhost:631/admin
now copy "cupsctl WebInterface=yes"
6. Open the Terminal app 
Now paste the content (command+v) and hit "enter" on keyboard (if you can't find the app try searching by using the "finder" on your Mac.)
7. You can now close the Terminal app. Go back to http://localhost:631/admin and click "Manage Printers"
8. Click on DYMO from the list, select "Administration" and hit "Set As Server Default"
9. From the next screen enter the "Media Size", "Resolution", "Media Source" and "Darkness". These options will vary depending on your Printer model. Your Mac will have the "Media Size" default to 2.25x4.00 on this example, but the next section will help you create a custom paper size.
10. Open a PDF file in Adobe Reader and from the tab select, File > Print > now click on "Page Setup" and say "Yes" if you get a pop up window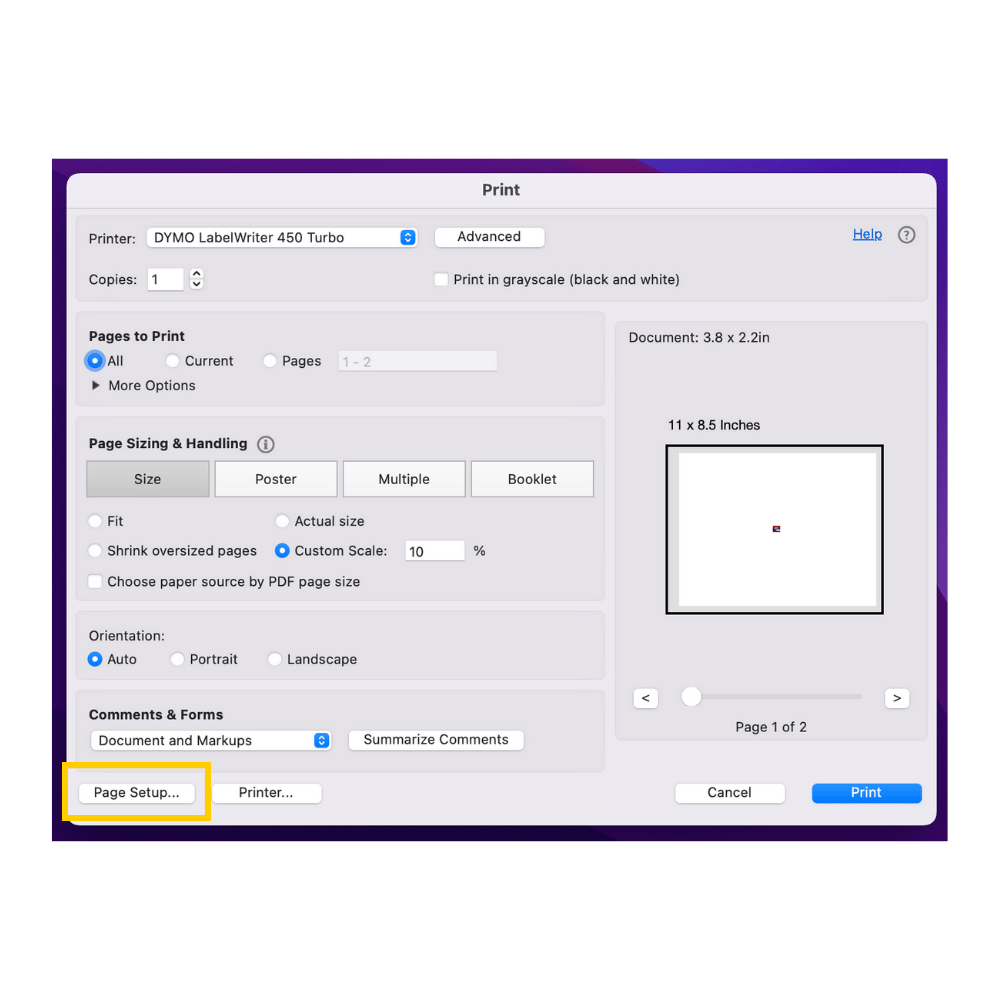
11. From the Page Setup, click on "Paper Size" and "Manage Custom Sizes"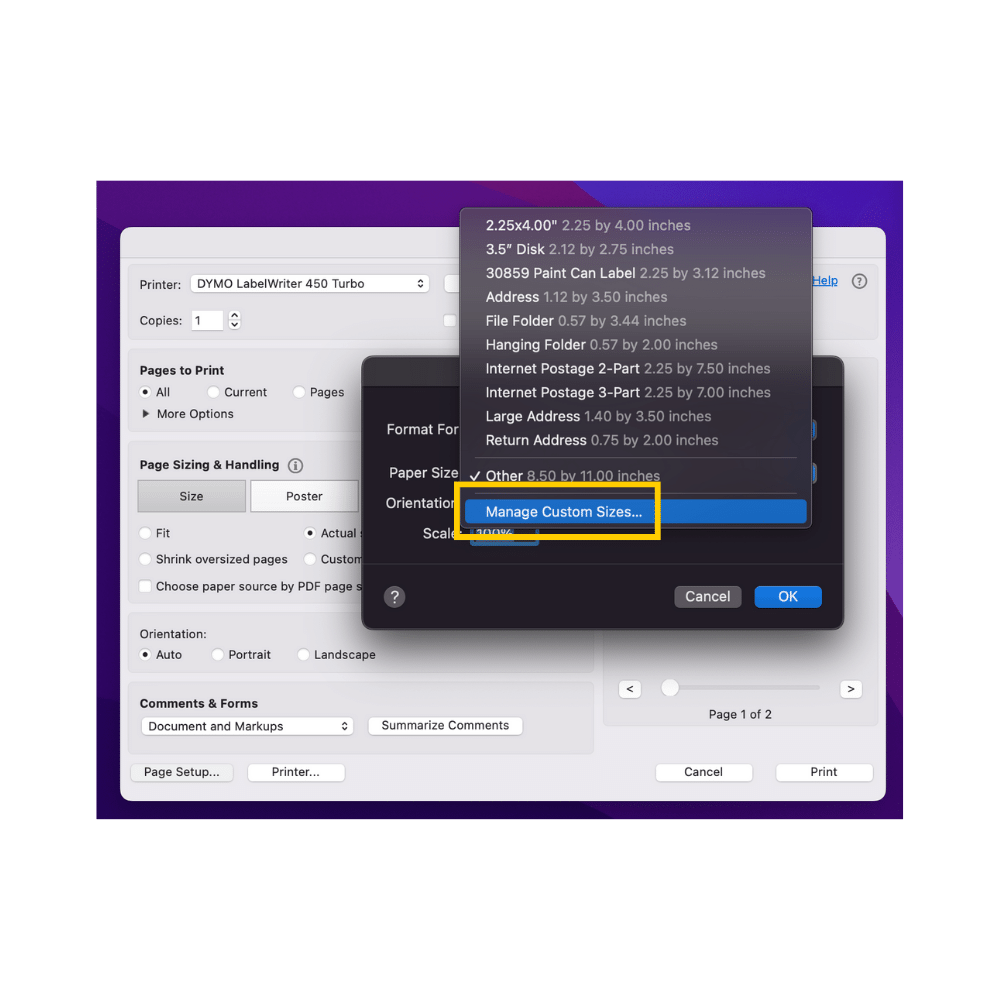
For more information Visit DYMO or contact the Aravenda team.
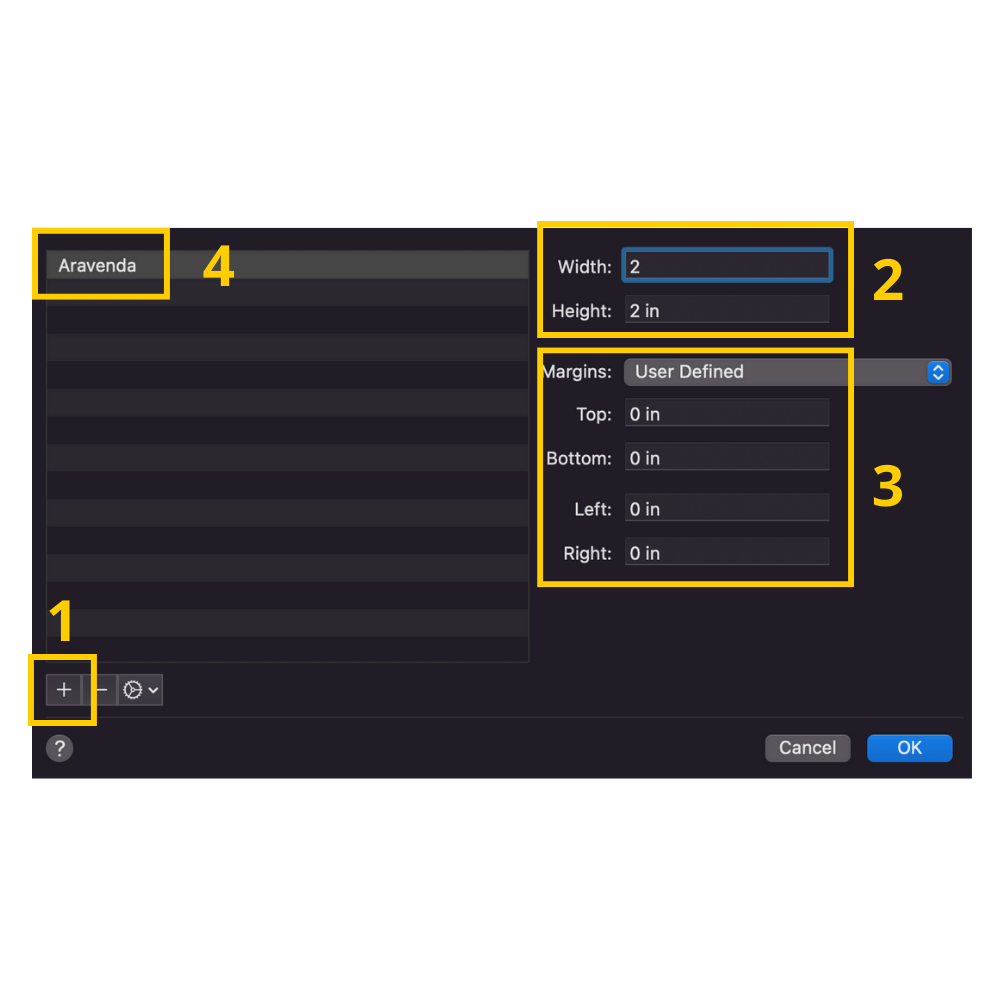
12. Final step, click the "+", change the width and height according with your label size, make sure you have the Margins to "0 in", and last double click the "Untitled" to rename your tag.
Related Articles
Installing a Network Zebra Printer on a Mac
This article provides the instructions to install CUPS driver for Zebra Printer on Mac OS environment. Read article hereUnable to print label - Print preview won't launch
The issue happens with Chrome Browsers where the Print Preview on the browser won't launch, and it seems to be more prevalent on Macs. To enable the Chrome print preview, follow the steps below: 1. Make sure to quit out of Google Chrome. To do this, ...Recommended Hardware & Supplies
This article will discuss all of the recommended hardware you will need for your Shopify and Aravenda needs, check out the links below and let us know if you have any questions: Recommended Hardware & Supplies Shopify Supported POS Hardware Globally